How to make poi - a detailed guide for making your own. Ball Making Secrets What tennis balls are made of
Hello, friends. Do you know what there is a ball on an elastic band for boxing? But how is it useful for a boxer? How to make it yourself? And where is the best place to buy it?
Training apparatus
A ball with an elastic band is a boxing simulator. In this area, the product "Fight Ball" is very popular.

What develops a ball on an elastic band for boxing? Here, the tasks of developing such qualities as:
- Reaction.
- Coordination.
- Attack accuracy.
- Feeling of distance.
In the USSR, many boxers trained with this projectile.
How to work with a ball on an elastic band? Here the designated simulator is used. First you need to adjust the gum in it. The ball should be at stomach height. This position is especially relevant for beginners. And the smaller the length of the elastic band, the more difficult the workout.

- The ball is pushed away from itself by hand. He needs to be hit hard with his fist. It flies down or away from the hitter. The key task is to hit the middle of the ball so that it flies in a straight line. Then it comes back to the face. In these moments, you need to have time to hit him again. According to this principle, continuous assaults follow. The ball must not reach the face.

For beginners, it is better to abandon powerful blows and focus them only down. The duration of work at a similar pace is 10-20 minutes, and every day. Until the performance is honed to perfection.

- The ball with an elastic band for boxing is put on the head again. The work is more intense, the force of blows increases. They go only in front of you, should always be in line with the eyes.

It is so good to perfect direct and side attacks. In work, you can use both hands alternately. Each fighter improves personal combinations. Intensity - the same as in paragraph 1.
- Similar actions as in paragraph 2 + defense. After each attack, you need to place your hands at the chin. This is how the habit of proper defense is developed. The elbows protect the body. The intensity is the same.
- Analogy with item 3 + movement. You need to move around the room. The work takes place in the shuttle. You have to keep hitting the ball. He should not fall, and the fighter manages to return his hands. The intensity is the same.
- Analogy with item 4. You just need to focus on the ball, but on a suitable object, for example:
- look at fellow workouts,
- watch fights or a movie on the screen
So peripheral vision and concentration develop well. And also:
- rapid reaction to moving targets,
- cumulative coordination in space,
- shoulder coordination,
- endurance,
- operational orientation and perception of data,
- accuracy of attacks on targets in motion,
- sense of distance
Self-creation of a projectile
How to make a ball on an elastic band for boxing? This work is not difficult. There are several versions of such homemade products:
First version. For her you will need: a baseball cap, an elastic band from linen, a tennis ball. Actions:
A. The ball is pierced through with an awl or a thin knife.
B. The end of the gum is tied in 3-4 knots. This way the rubber won't pop back out.
B. The elastic band is threaded through the hole created.
D. Its other ending is tied to a baseball cap. The length of the elastic should be such that the ball is positioned on the line of the abdomen.
It turns out a tennis ball on an elastic band for boxing.

However, this version has the following shortcomings:
- the ball bounces too easily from the fist, the exercises pass without power,
- you can not hone side attacks.
To make a different version of the ball on an elastic band for boxing with your own hands, you must perform the following algorithm of actions:
- A wool sock is used. It is optimal for this task. It is filled with uncooked rice. This is how a miniature pear is formed. Its diameter: 7-8 cm.
- Lace is used. Its length is 7-8 cm. It is threaded into a massive button and tied into a ring.
- The resulting combination of button and ring is placed in the sock, more precisely in its neck. In this case, the ring sticks out. The elements are firmly tied with a powerful thread, such as nylon. Excess sock is eliminated with scissors.
- An elastic band is used. It develops in 2-3 layers (its thickness matters here). It needs to be stitched along the whole length, every 10-11 cm. This is how a kind of tourniquet is formed.
- The result of item 4. joins a miniature pear.
About professional model
What is the name of the ball on an elastic band for boxing, or rather the professional version? The answer is Fight Ball Boxing.

This is an amazing performance trainer. It is optimal for beginners and experienced boxers. There are no shortcomings inherent in home-made counterparts.
Its manufacturing technology is as follows:
Genuine leather was used to stitch its shell. The fillers of his pears are carefully selected special granules. They give the product shape and mass. For "mounting" on the head, a cap with customizable parameters is used.
The rubber band for fastening the ball is distinguished by a scrupulous selection of such qualities: elasticity, elasticity and strength. The position of its attachment is the crown. Thanks to this, the honing of lateral and direct, as well as elbow attacks, is effectively carried out.
Working with this simulator, the athlete invests as much as possible in all strokes. A efficiency training process increases solidly.
Specialists tested and upgraded this projectile based on the preferences of professional fighters from different martial arts.
Outwardly, this is a simple boxing ball with an elastic band, which is easy to buy on the Internet, for example, on the Fight Ball Boxing / Shop resource or another specialized outlet. Can pick up suitable model, although this product is universal.
For example, the average price of a ball with an elastic band for boxing with a parameter of 50 cm is 530 rubles.
Other advantages of the projectile:
- Simple yet very durable construction.
- It includes a special ball, characterized by the necessary firmness and elasticity. Its cover is a special synthetic fabric. She is very soft. This prevents hand injuries.
- There is a strong fabric strip. Its material is a special hygienic fabric that absorbs sweat. It's easy to clean. She keeps her appearance for a long time.
- external attraction.
- Modest mass. The product fits easily into a sports bag.
- It can be used effectively in various places: room, gym, park, etc.
- Despite its simplicity, the projectile can exhaust the practitioner as much as possible. It makes you intensively work out the most complex attacks and combinations.
- Thanks to these exercises, a fighter acquires the most important characteristics and skills: excellent reaction, high endurance, meticulously accurate strikes, and perfect coordination of movements.
Thus, the Fight Ball Boxing simulator is notable for its external simplicity and high efficiency. The fighter demonstrates solid results by working with him even for half an hour every day.
Conclusion
Such an extremely useful and practical simulator can be done by yourself. But top scores give only professional models.
This page describes how to make a DIY Fight Ball simulator at home. Making a punching machine is easy.
Option 1. Cheap and cheerful.
You will need: tennis ball, elastic band, baseball cap.
Instruction
- Poke a tennis ball with a sharp object (such as scissors). Be careful.
- Tie a few knots at the end of the elastic so that it does not “jump” back.
- Push the end of the elastic with knots through the hole in the ball.
- Tie the other end of the elastic band to the cap, while choosing the length of the elastic band so that the ball is at the level of the navel.
That's all, 10 minutes and the fight ball boxing simulator is ready to use!
Video instruction
Minuses:
- no effort is needed to make the ball fly away from the fist;
- there is no possibility to practice side impacts.
Option 2. Cheap, right.
- Stuff a sock with rice, preferably woolen (it's perfect for this). You should get a mini-pear with a diameter of 8 cm.
- Thread a lace 8 cm long through a large button and tie it into a ring.
- Insert the button ring into the neck of the sock (the ring should stick out of the neck). Tightly “burn” with a nylon thread. Cut off the excess part of the sock with scissors.
- Take a linen elastic, fold it two or three times (depending on the density of the elastic) and sew along the entire length every 10 cm.
- Attach the resulting "harness" to the mini-pear.
Option 3. Right, effective.
FIGHT BALL BOXING from company FIGHTMASTER This effective simulator for masters and novice fighters. It does not have the negative properties inherent in homemade simulators.
Strengths
- The shell of the ball is sewn with strong threads made of genuine leather.
- The pear simulator is filled with special granules to give shape and weight.
- Comfortable and secure headband with adjustable size and ventilation inserts.
- Elastic band for attaching the ball is optimally matched for elasticity, stretch and strength.
- The elastic attachment is located on the top of the head, this makes it possible to work out not only direct punches, but also side, as well as elbow strikes.
- The simulator was tested and improved in the process of training, taking into account the wishes of professional athletes various kinds martial arts and martial arts.
- You will have to "invest" in each shot, and not just put your fists under the ball. This makes the workout more efficient.
- The FIGHTMASTER company has been manufacturing and improving the FIGHT BALL BOXING simulator since 2015.
The performance of this seemingly simple, but in fact high-tech sports equipment, we will learn through a tour of one of the largest factories for the production of tennis balls.
One factory can produce up to 300,000 balls per day. The assembly originates from a 900 kg rubber blank, from which 2,000 balls are obtained.

At first, the blank is hard as a stone. Then it is heated and treated with lubricants in order to soften it. The rubber itself may not bounce high, and wear out quickly. Therefore, a chemical mixture is mixed into the material for good rebound and durability.

The factory has its own proprietary blends of more than ten ingredients. One of them is sulfur, which gives heat, vulcanizes rubber, that is, makes it harder. Next, the rubber is stirred and leveled, squeezed out with no air bubbles, which weaken the elasticity of the ball. Then, from the layers of rubber, long strips are cut, which are sent to a press, in which balls are stamped from them. Next, the balls are treated with silicone and hot water so that they are smooth and can slip out of the mold.

If the balls were made of hard rubber, then they would come out so heavy that after a few matches, tennis players would simply fall off their arms. Therefore, they are made hollow so that they start to bounce better and become lighter. Each hard ball is placed in a hot mechanical press.

Sheets with halves of the core move along the line, and a razor-sharp stamp pushes them out.

A huge number of halves of the balls are raked in the right direction in order for the polisher to cut the edges to the desired size. After that, the edges are covered with a layer of glue activated by heating.

Finally we got ready to give the ball a bounce. To do this, the halves of the balls are placed in a machine that gives them the ability to rebound, creates tremendous pressure inside the ball. Prepared halves of the balls are manually laid into the molds.

After the press is closed, air is forced into it under pressure. This raises the pressure to 1.5 bar, causing the two halves of the ball to stick together.

Nothing is visible from the outside, but inside this ball is charged with potential energy. Hitting the surface, he tries to immediately return to his original position. Molecules compressed inside the ball show resistance, and the ball bounces back.

Now you need to think about ball control. The core is processed into a glue that is activated by heat in order to prepare for coating the most important component for any tennis ball - fluff. And now let's analyze one of the main components of a tennis ball - felt. During the game, the tennis player has to control the rotation and braking of the ball, which is made real thanks to the felt. A feature of this material is its fleecy surface, which, when the ball is in flight, does not allow air to easily slide over its surface.

This makes the flight of the ball more leisurely than completely smooth balls, but allows the tennis player to control it more easily. Felt blanks for an individual ball are stamped with a special press.

Two such blanks are combined and create a ball cover. Glue is applied to the outside of each blank to secure the felt. After that, the two blanks are combined together into a ball.

Then the ball moves along the conveyor. It is barely squeezed to make sure that the felt is perfectly fixed. The balls are placed in a heat press at 325°C for 12 minutes to allow the felt to firmly adhere to the rubber core.

The final step in the manufacture of tennis balls is their treatment with hot steam. This is done in a special drum.

This drum performs one of the main functions. It is made of fluffy felt, which provides excellent ball control.
We ruthlessly hit them with a racket, kick and crush, not even suspecting how much effort, time and skill it takes to produce one small ball.
Before taking on the shape we know, the balls overcame more than one stage of evolution. They were cork and rubber, of arbitrary diameter from three to five centimeters. It was quite difficult to play with such equipment: the cork bounced off the table surface badly, and rubber balls, on the contrary, jumped unpredictably in different directions.
But in 1856, the scientist Alexander Parkes managed to create a new material, thanks to which table tennis made a significant step forward. True, the inventor did not try at all for sports. He didn't care about sports at all. Parkes wanted to put into production a material - a substitute for expensive ivory. The discovery promised good dividends: elephant tusks are in great short supply, and jewelry made from a quality substitute would appeal to many English fashionistas. However, the hopes of the scientist failed to come true. There was a problem: the material ignited too easily. That is, it was simply flammable. And Parkes was never able to find a use for his discovery.
Time passed, and the invention of Parkes could not find its purpose. Although in 1870 the strange material received an official name. The Celluloid Manufacturing Company has registered it under its trademark. And the world first heard about celluloid. Celluloid is plastic, but plastic is not plain. Like ordinary plastic, it hardens when exposed to heat, but then becomes plastic again. It is this property that makes celluloid unique.
And a few years later, two companies were already fighting for the right to produce celluloid. Although sports again had nothing to do with it. In the late 1880s, celluloid was developed for photographic film. Hannibal Goodwin and Eastman Kodak Company received the coveted patent. However, both firms coveted a monopoly. To eliminate competitors, Hannibal Goodwin sued Eastman Kodak Company for copyright infringement. And she won the case. Thus, through competition, the basis for the production of photographic film was laid, and later this led to the development of motion pictures.
The high point of celluloid has come. In the late 19th - early 20th century, he finally gained popularity. Knife handles, ballpoint pen cases, and even toys were made from this material. But the glory left as unexpectedly as it appeared: celluloid ignited and collapsed too easily, so in the middle of the 20th century it was replaced by safer and more resistant polyethylene.
Capricious and delicate material could take root in only one area. But there he became necessary, irreplaceable and unique. Celluloid came into the sport and stayed there - in the form of a table tennis ball. In 1896, the German firm Schildkröt (Turtle) produced the first celluloid ball. The success was huge. New balls bounced high, obeyed the athlete, flew quickly and accurately. The advantages of the new materials were obvious. By the beginning of the 20th century, all major tennis firms had acquired patents for the production of balls. And since 1902, the business was put on the conveyor: manufacturing plants produced up to 2 million balls a week. Despite being highly flammable and short-lived, celluloid has been the only ball material for over 100 years. Why? Only he has the necessary characteristics. Celluloid is able to hold its shape for a long time. In this he is helped by special ingredients. For example, camphor. Its smell remains on the inner walls of the ball for several years. Celluloid endures even the most strong blows: does not deform, remains rigid and, at the same time, elastic. Other materials are not capable of this.
However, celluloid is flammable. Therefore, even after a hundred years, the manufacture of table tennis balls is a laborious and expensive process that requires precise work and constant control. Safety measures must be followed.
Asia has a monopoly on production. All balls come from Far East. Balls approved international federation table tennis, make only five specialized factories. And they are all in Asia: two in China, two in Japan and one in South Korea. Although there are many more factories in China, their products are intended for the amateur level.
The manufacturing process begins with a rectangular celluloid sheet, about 1mm thick. From it, as from dough, small round blanks are cut.  These blanks are superimposed on a hemisphere, that is, a half of the ball. After that, the celluloid is heated to 100 degrees (mainly with the help of water vapor) and, softened, is again stretched onto a hemisphere. The process is called "deep drawing". The result is separate halves of the ball.
The halves of one ball vary slightly in size. This is done intentionally: it is more convenient to insert the parts into each other. But first, the halves are weighed. Such accurate calculations are required only in a pharmacy. The difference in weight should not exceed one hundredth of a gram - otherwise the ball will become egg-shaped.
After drawing, the halves of the ball are carefully glued together with an alcohol-containing liquid. It softens the surface of the material. At the place of gluing, a double layer of celluloid is formed - this is a seam. However, there is no imbalance, since when drawing the mass of the ball is evenly distributed over the entire surface. 
The ball is then placed in a hollow metal ball and immersed in a hot water bath. The walls of the ball are pressed against the walls of the hollow ball. Through this process, the seams are aligned. High quality balls go through this procedure twice - for more confidence in their perfect shape.
The last stage of processing takes place in a large rotating drum. From the outside, it looks like washing, only instead of laundry, balls and small light pebbles rotate in the drum. "Washing" lasts several hours - until the mass of the ball reaches the desired mark. The pebbles rub against the balls and grind them. This forms a white powder on the surface of the balls. New balls leave traces on the lining - dust from celluloid and stones. Gradually, the balls are “beaten up”, and the linings stop getting dirty.
The next stage of control is weighing. Each ball is weighed separately and checked by a special machine for stiffness. For balls, this is a difficult test. The metal pin presses on different places, and if the ball misses too much in one of them, the poor fellow is sent to marriage. He's too soft. To control the roundness (evenness) of the balls, they are rolled on an inclined plane. The details and essence of this procedure are kept secret by the manufacturers.
At the end, each ball requires "aging" - according to information from manufacturing companies, this takes several months.
Three-star balls are not made separately. They are selected from the general population. The best copies are decorated with three stars. And worse balls get training status.
The ITTF strictly monitors the quality of the balls. No ball will receive a license without proper verification.
According to table tennis rules, the ball must be:
A) spherical, with a diameter of 40 mm;
B) weighing 2.7 grams;
C) dull white or dull orange.
In fact, there are still some concessions. The diameter of the ball can range from 39.5 to 40.5 millimeters, and the weight can vary from 2.67 to 2.77 grams. In this range, the difference in rebound and flight speed is imperceptible. In order to receive ITTF approval, balls must also comply with several other regulations. For example: when a ball is released from a height of 305 millimeters onto a standard steel block, it should bounce between 240 and 260 millimeters. True, this requirement is not the most stringent. It is performed by almost all tested balls. It is much more difficult to meet the "weight" and "height" norms.
But now everything is behind and the balls with the ITTF badge are sailing. The sea route is the only safe route for this cargo. The risk of fire is too great. A little time will pass, and a quiet life will end. They will be beaten with a racket, thrown into the air, kicked. They will train and play competitions. But what can you do - table tennis players cannot do without a celluloid ball.
What is poi - a few words...
A poi is a pair of small weights on a string or chain. And they came to us - from New Zealand, where people used poi in their traditional dances. Nowadays, sing swirling has swept the whole world. Still would! Spinning poi is not only amazingly interesting, but a great way to cheer yourself up and others!  In addition, this good workout for the body - coordination, plasticity improve, the muscles of the whole body develop and strengthen! And of course, it's beautiful! When the poi spins, even if it's training poi, it's already a whole performance! And when a real fire is lit in his hands, it is no longer possible to take your eyes off the amazing action ...
How to make poi - a detailed DIY guide
Training poi are made for many purposes. For example, making them is much easier than combat (fiery). Also, it is better and more convenient to train with them - they are lighter, and most importantly, they will not stain you and your clothes with black soot, because fire poi, after spinning with fire, become soot. And of course, you can take them with you everywhere and always!
So, how to make poi? We answer:
Making training poi - method number 1 (tennis balls)

To make our own poi, we need 2 tennis balls and a couple of ropes. The balls have ideal weight, just what you need. Their bright color makes twisting spectacular, and their comfortable shape makes it easy. Just bind tennis balls ki to the rope, of course, is impossible. They will fall out and it will constantly annoy you. Therefore, we do the following. Two holes are made in the ball opposite each other, one is larger and the other is smaller. Piercing them is quite easy, you can take an ordinary awl or even pierce with a knife, just be careful. Now, we need a small piece of wire. We make from it a kind of “needle” for sewing. We just bend it in half, and we get an "ear" into which the prepared rope is inserted. We thread the rope into a small hole through the entire ball and take it out of the large one with the help of our “needle” on the other side, and then, having removed the wire, we make a good and large knot at its end. We retract the knot into the ball until it stops against the wall from the inside of the ball. So the ball will never jump off and will not be lost. All the same is done with another tennis ball. It remains only to make loops on the poi - for this, in the free ends of the rope, it would be more convenient to hold them. Actually, everything, the first version of eating is ready, and you can train)))
Improvement # 1 - Replace the rope with a chain

So, we make training poi better by replacing the rope with a metal chain. To do this, remove the rope from the balls (or do not insert it, who has not done it yet). Usually a chain with a link thickness of 1.5 mm is taken. We will need it no more than 1 meter - for both poi, that is, 2 pieces of 50 cm each, do not worry, then we will shorten it if it is a lot for you. In the ball, we make an incision on the opposite side of the small hole, that is, we increase the large hole, cut the ball a little to the sides. We insert the chain into the small hole and pull it out of the large one. Now, having pulled out a small piece of the chain from the ball, we need to hang something on the tip that will rest inside the ball against the walls near the small hole when we pull the chain. For this, a bolt with a nut, or a key ring, or something of your choice that you screw with ordinary wire will come off. We retract our weight - emphasis on a tennis ball and shorten the chain for ourselves. However, it is better not just to insert the chain into the sword, but to do it with the help of an anchor. Those. first we insert the anchor into the ball, and then we put a chain on it. (The anchor is sold in hardware stores, and we need the one with the ring) It remains to make handles for our training poi. To do this, you can take the tighter rope, or use improvement No. 2.
Improvement #2 - Making professional poi handles

To make poi more professional, we will make good pens for them. For this, we buy a sling, about 2 cm wide. For those who do not know: a sling is a webbing from your backpack, and it is sold in any fabric store. We need 2 pieces of it about 25 cm each (depending on the thickness of your fingers). We fold the sling as in the photo, and make a through hole in it, where you will insert the eyelets - 1 eyelet in each eyelet (sold in the same fabric stores, the main thing is that they have holes). Now we put a thick key ring into the handle and into the tip of the chain. Very often, the eyelet is not inserted, but handles are made using a half ring and threads with needles. Those. insert the half ring and sew the handles with strong threads. If desired, the sling can be replaced with leather.

Improvement #3 - Insert swivels


Swivels are inserted between the chain and the handle. I don't think you will have much difficulty. They allow the ball with the chain to spin about its axis. This is necessary in a number of complex elements when twisting poi: for example, the hyperloop element. Where to get swivels? It's simple - in a large assortment they are sold in fishing stores. Approaching the seller, say that you need 2 swivels for a catfish or a shark))))))
Improvement #4 - Miscellaneous little things
 Hooray! You, following the instructions, managed to make poi yourself! However, a couple of chips can still be added. Firstly, for an experienced poyster, the weight of the pois is of great importance. It is regulated as follows. We pull out the chain with our weight - an emphasis from the large hole after eating and hang additional weight on the weight. For example, you can add a couple of large and heavy nuts. Secondly, bright ribbons can be made on our poi. When twisting, they will repeat the trajectory and it will look very impressive. It is done simply - in the same way we pull out the chain with our weight - with an emphasis from the large hole of the tennis ball and fasten the ribbons. Do not forget that the ribbons can get tangled during torsion, and in complex elements, they interfere at all. Therefore, it is worth considering the feasibility of this improvement.
Making training poi - method number 2 (poi socks)
If you want to spin the poi right now and there is no time to run to buy a chain or sling, there is an easy option for you how to make poi yourself! To do this, take socks, preferably longer, and just stick tennis balls into your socks! Of course, bright socks will look more interesting, and their length should be as large as possible. Therefore, women's socks are more suitable for this business. By the way, socks can be replaced with children's tights, cut off and a little hemmed.
Well, if the balls were not at hand, do not despair, we will make poi differently! Pour some filler into the socks, which will give shape and weight. Well, if there is rice or buckwheat, they give just the right weight for torsion.
It is advisable to do this: take a pair of simple unnecessary socks, fill them with the selected filler and form two balls out of them. All excess is either cut off, or neatly bent. It is very important to make the balls tight so that the filler inside does not shake, creating unnecessary movements. Therefore, after filling, we tighten the sock very tightly so that it fits snugly around the base, then we sew it with strong threads. That's it, now you can just put our buns in beautiful and long socks, and enjoy - you made the poi yourself! By the way, they are much safer than the first option. A loose base, hitting a poyster, cannot seriously injure him, since all blows are extinguished. By the way, gloves can be used instead of socks. Everything is done in exactly the same way, and poi - socks are very original.
Similar articles
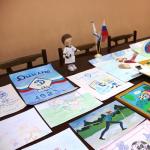 Children of UFSIN employees expressed their attitude to sports in their work
 Biology Olympiad. A look from within. Cut out. Olympiad in Biology Quick preparation for the Olympiad in Biology
 Changes made to the order of the Ministry of Emergency Situations of Russia "On the approval of the Manual on the physical training of personnel of the federal fire service
 What to ride for a child in winter